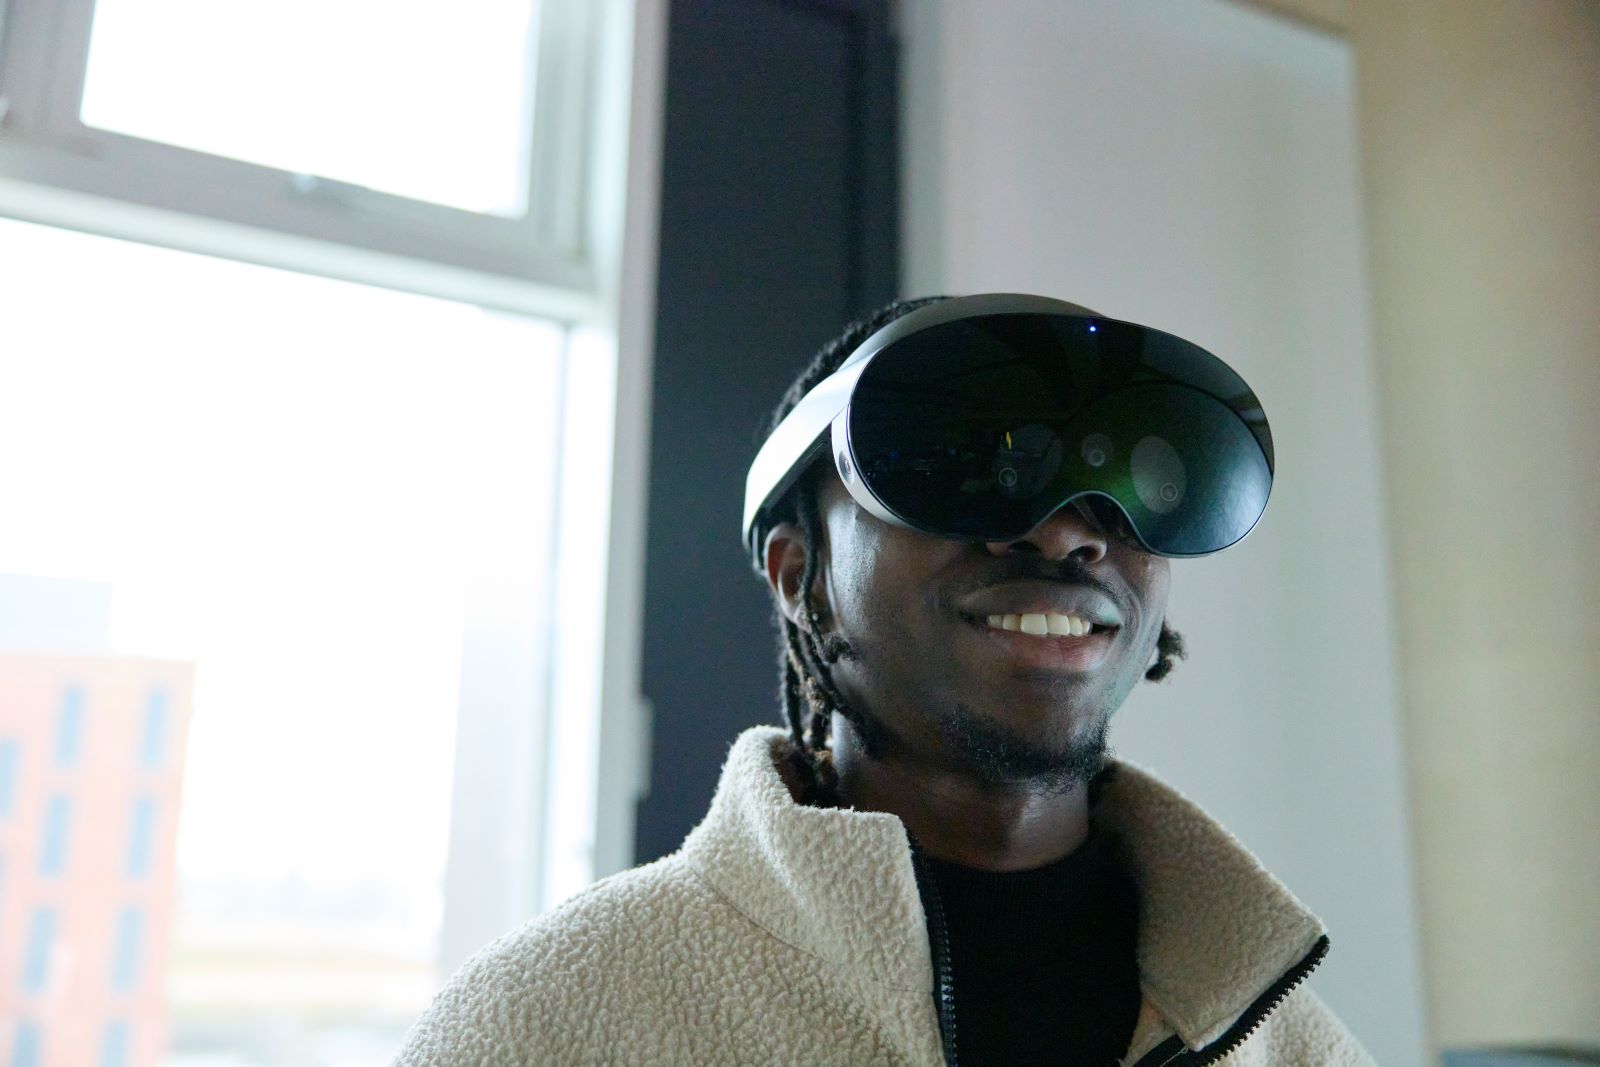
What was the challenge?
The Headsets for Hope project needed to get 360° cameras and VR headsets into partner schools in a way that non-specialist teachers and support staff could pick up quickly and use safely with pupils with special educational needs and disabilities (SEND). Three problems stood out early on:
- Choosing editing software. Most 360° editing tools are paid, and the free ones typically upload footage to the vendor’s own cloud. Because the footage could include identifiable children, any tool that moved data off-site needed to be checked before it could be trusted with school content.
- Training schools with no prior VR experience. Staff and pupils had never used a 360° camera or a VR headset before, so the handover had to work without an in-person expert on hand every time.
- Supervising pupils while immersed. A pupil wearing a headset can’t see or hear the room around them, and some SEND pupils are additionally sensitive to bright light or sound. Staff needed a way to know what a pupil was seeing and experiencing in real time, not just trust that it would be fine.
What did you do?
- Self-trained on the equipment. Before anything could be handed to a school, I taught myself to use the Pico VR headset and the Insta360 camera end-to-end — charging, pairing, recording, and file transfer.
- Evaluated editing software against a data-privacy requirement. Several free and paid 360° editing packages were compared. Insta360 Studio (the manufacturer’s free desktop app) was the strongest fit, but it syncs with Insta360’s own cloud, so before adopting it I investigated what data it actually sends off the device — this was treated as a hard requirement given the footage involves students, not an afterthought.
- Designed plain-visual instructional materials. Rather than a long text manual, I built two infographics and a combined fact sheet in Canva (using AI assistance to help draft and structure the content): one covering VR headset use (charging, pairing, boundary setup, Wi-Fi, storage) and one covering the Insta360 workflow (camera setup, recording, transferring, casting, exporting).
- Worked out live supervision via screen casting. The Pico headset has a built-in casting feature (Library > Screen Cast > Cast to Browser) that streams the headset’s view to a laptop over Wi-Fi. It wasn’t well documented, so this took some trial and error to get working reliably — once solved, it gave staff a direct view of exactly what a pupil was seeing, in real time.
- Delivered equipment and training to partner schools. I met with school staff in person, handed over the headsets and cameras, and walked them through the fact sheets and infographics as the shared reference material.
- Briefed schools on the content to capture. Schools were guided to film footage from the pupils’ perspective around travel challenges and solutions; the team also captured supporting 360° footage around the University of Northampton campus.
- Set up a private YouTube channel as the central video store. Rather than leaving footage scattered across SD cards and phones, we created a private channel to host all VR footage in one place, taking advantage of YouTube’s native 360° playback.
Technology Use
- Pico VR headset and controllers — playback and recording of 360° immersive experiences
- Insta360 360° camera — footage capture
- Insta360 mobile app (iOS/Android) — camera control, recording, and transfer to phone
- Insta360 Studio (desktop) — free video editing, chosen after checking its data-handling behaviour
- Pico’s built-in Screen Cast (Library > Screen Cast > Cast to Browser) — live-streaming the headset view to a laptop for supervision
- Canva, with AI-assisted drafting — design of the infographics and fact sheet
- A private YouTube channel — central storage and 360°-native playback of all project footage
What did this look like in practice?
Two infographics and a combined fact sheet were produced as the schools’ primary reference material. The first covers the VR headset lifecycle from charging through to storage:
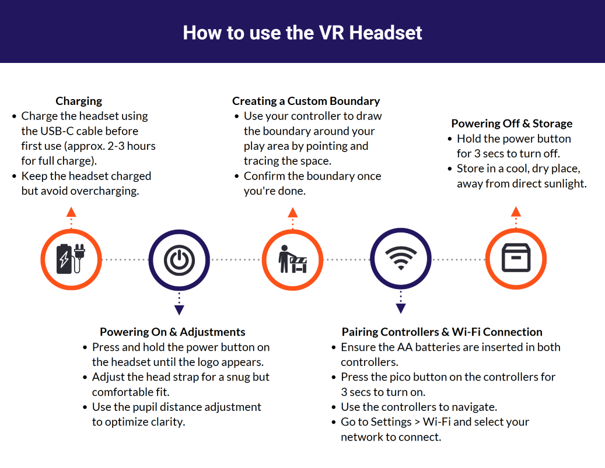
Long description: Infographic titled How to use the VR Headset showing a step-by-step guide for use. The process begins with charging the headset, powering on and adjustments, creating a custom boundary, pairing controllers and WiFi connection, and then powering off and storage.
The second covers the full Insta360 workflow, from powering on the camera through to casting the VR feed to a laptop and exporting finished video:
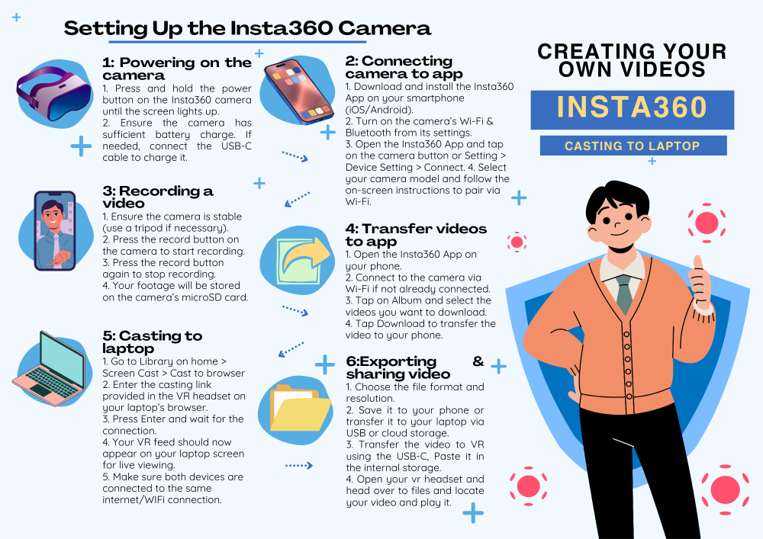
Long description: Infographic titled Setting up the Insta360 camera/ Creating your own videos showing a step-by-step guide for use. The process begins with powering on the camera, connecting camera to app, recording a video, transfer videos to app, casting to laptop, then exporting sharing video.
What was the impact?
- Faster, repeatable onboarding: a single visit with the fact sheets and infographics replaced what would otherwise have needed repeated one-to-one technical support per school.
- Safer independent use: the live screen-casting workflow meant staff could let a pupil use the headset with real-time oversight, directly addressing the supervision and sensitivity concerns identified as a challenge.
- A sustainable, low-cost content pipeline: using the manufacturer’s free desktop software (after checking its data handling) avoided adding paid-software costs to an already tight project budget.
- Unexpected reach: project visibility around this equipment and approach led to a local artist borrowing project cameras for an Arts Council bid, and to enquiries from West Northamptonshire Council and Billing Brook School about establishing an ongoing technology R&D hub.
Ethical or practical considerations?
- Data privacy: footage involving pupils cannot be assumed safe just because a tool is free — the Insta360 desktop app’s cloud sync had to be specifically investigated before it was used on school content.
- Safeguarding and accessibility: some SEND pupils are sensitive to bright light or sound, and a pupil wearing a headset is effectively cut off from the room — the screen-casting solution was built specifically to let staff monitor and intervene without needing to interrupt the pupil.
- Consent and identifiability: because footage can include pupils’ faces and voices, content was kept on a private (not public) YouTube channel rather than an open one.
- Accessibility of the training itself: materials were deliberately built as short visual infographics rather than dense manuals, since the audience was non-specialist teaching and support staff, not technical staff.
Reflections and Advice
What worked well?
Visual, step-by-step infographics got schools operational quickly without needing an expert present every time. The private YouTube channel gave a familiar, low-cost home for a growing library of 360° footage. Working out live screen-casting gave staff enough confidence in supervision to let pupils use the headset more independently.
What would you refine or change next time?
I would check a vendor’s data-handling and privacy policy earlier and more formally — ideally in direct consultation with each school’s data protection lead — rather than investigating it myself after the software had already been shortlisted. I would also write up the screen-casting supervision approach as a documented risk-assessment step from the start.
What advice would you give to colleagues considering something similar?
Treat ‘free’ software’s data policy as a checklist item before adoption, especially where under-18s are involved — don’t assume free means safe. Test the monitoring/casting workflow, not just the recording workflow, before rolling equipment out to schools. Keep instructional materials short and visual; a one-page infographic gets used far more reliably than a long manual.
Any further reflections?
This work was carried out as a 2nd-year BEng Electronics and Computer Engineering student in a Research and Technical Assistant role. It was a useful practical bridge between technical skills (hardware, mobile and desktop app ecosystems) and safeguarding-aware design for a vulnerable user group — a combination not often covered directly in coursework.
Quick start guide for colleagues
- Insta360 camera: power on and check charge → install the Insta360 app and pair via Wi-Fi/Bluetooth → record with a stable mount → transfer footage to the app → edit for free in Insta360 Studio (having checked its data-handling policy first).
- VR headset: charge fully before first use → power on and adjust the strap and pupil distance → pair the controllers → draw a play-area boundary → connect to Wi-Fi → power off and store away from direct sunlight when finished.
- Supervision: use Library > Screen Cast > Cast to Browser on the headset to stream the live feed to a laptop on the same Wi-Fi network, so a member of staff can monitor the pupil’s experience in real time.
- Storage: upload finished 360° footage to a private YouTube channel so it can be viewed natively in 360° and kept in one central, access-controlled place.